

The Day My World Exploded
Blown Primers
feature By: Kurt Schuttenberg | April, 25
It happened in a flash. A loud one at that. A primer went off while loading shot shells on my MEC 20-gauge, equipped with a primer feeder tray. The explosion scared me enough to let go of the lever. The spring-loaded lever banged up into the press and spilled primers all over, but there was no chain reaction.
Shaken and with ears still ringing, I wanted to know what went wrong. I examined the shell I just primed and found a new primer perfectly installed. No smoke marks, nothing unusual. Huh?
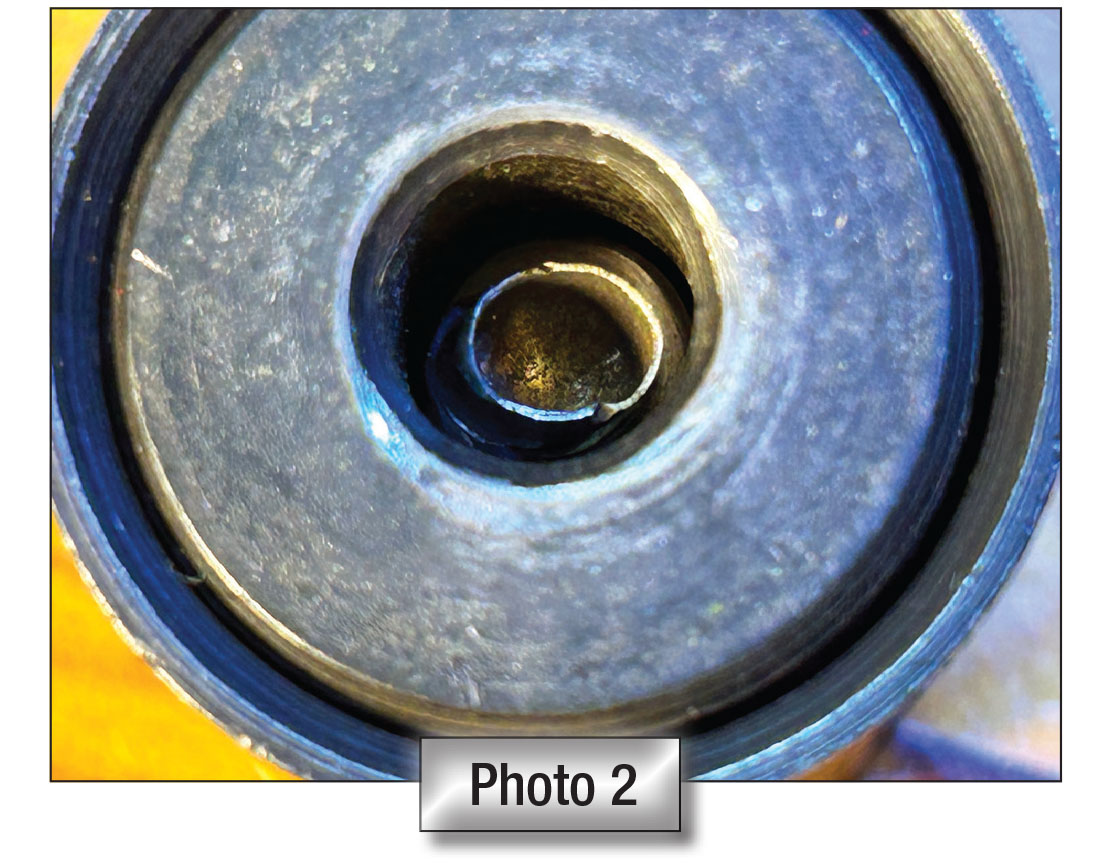
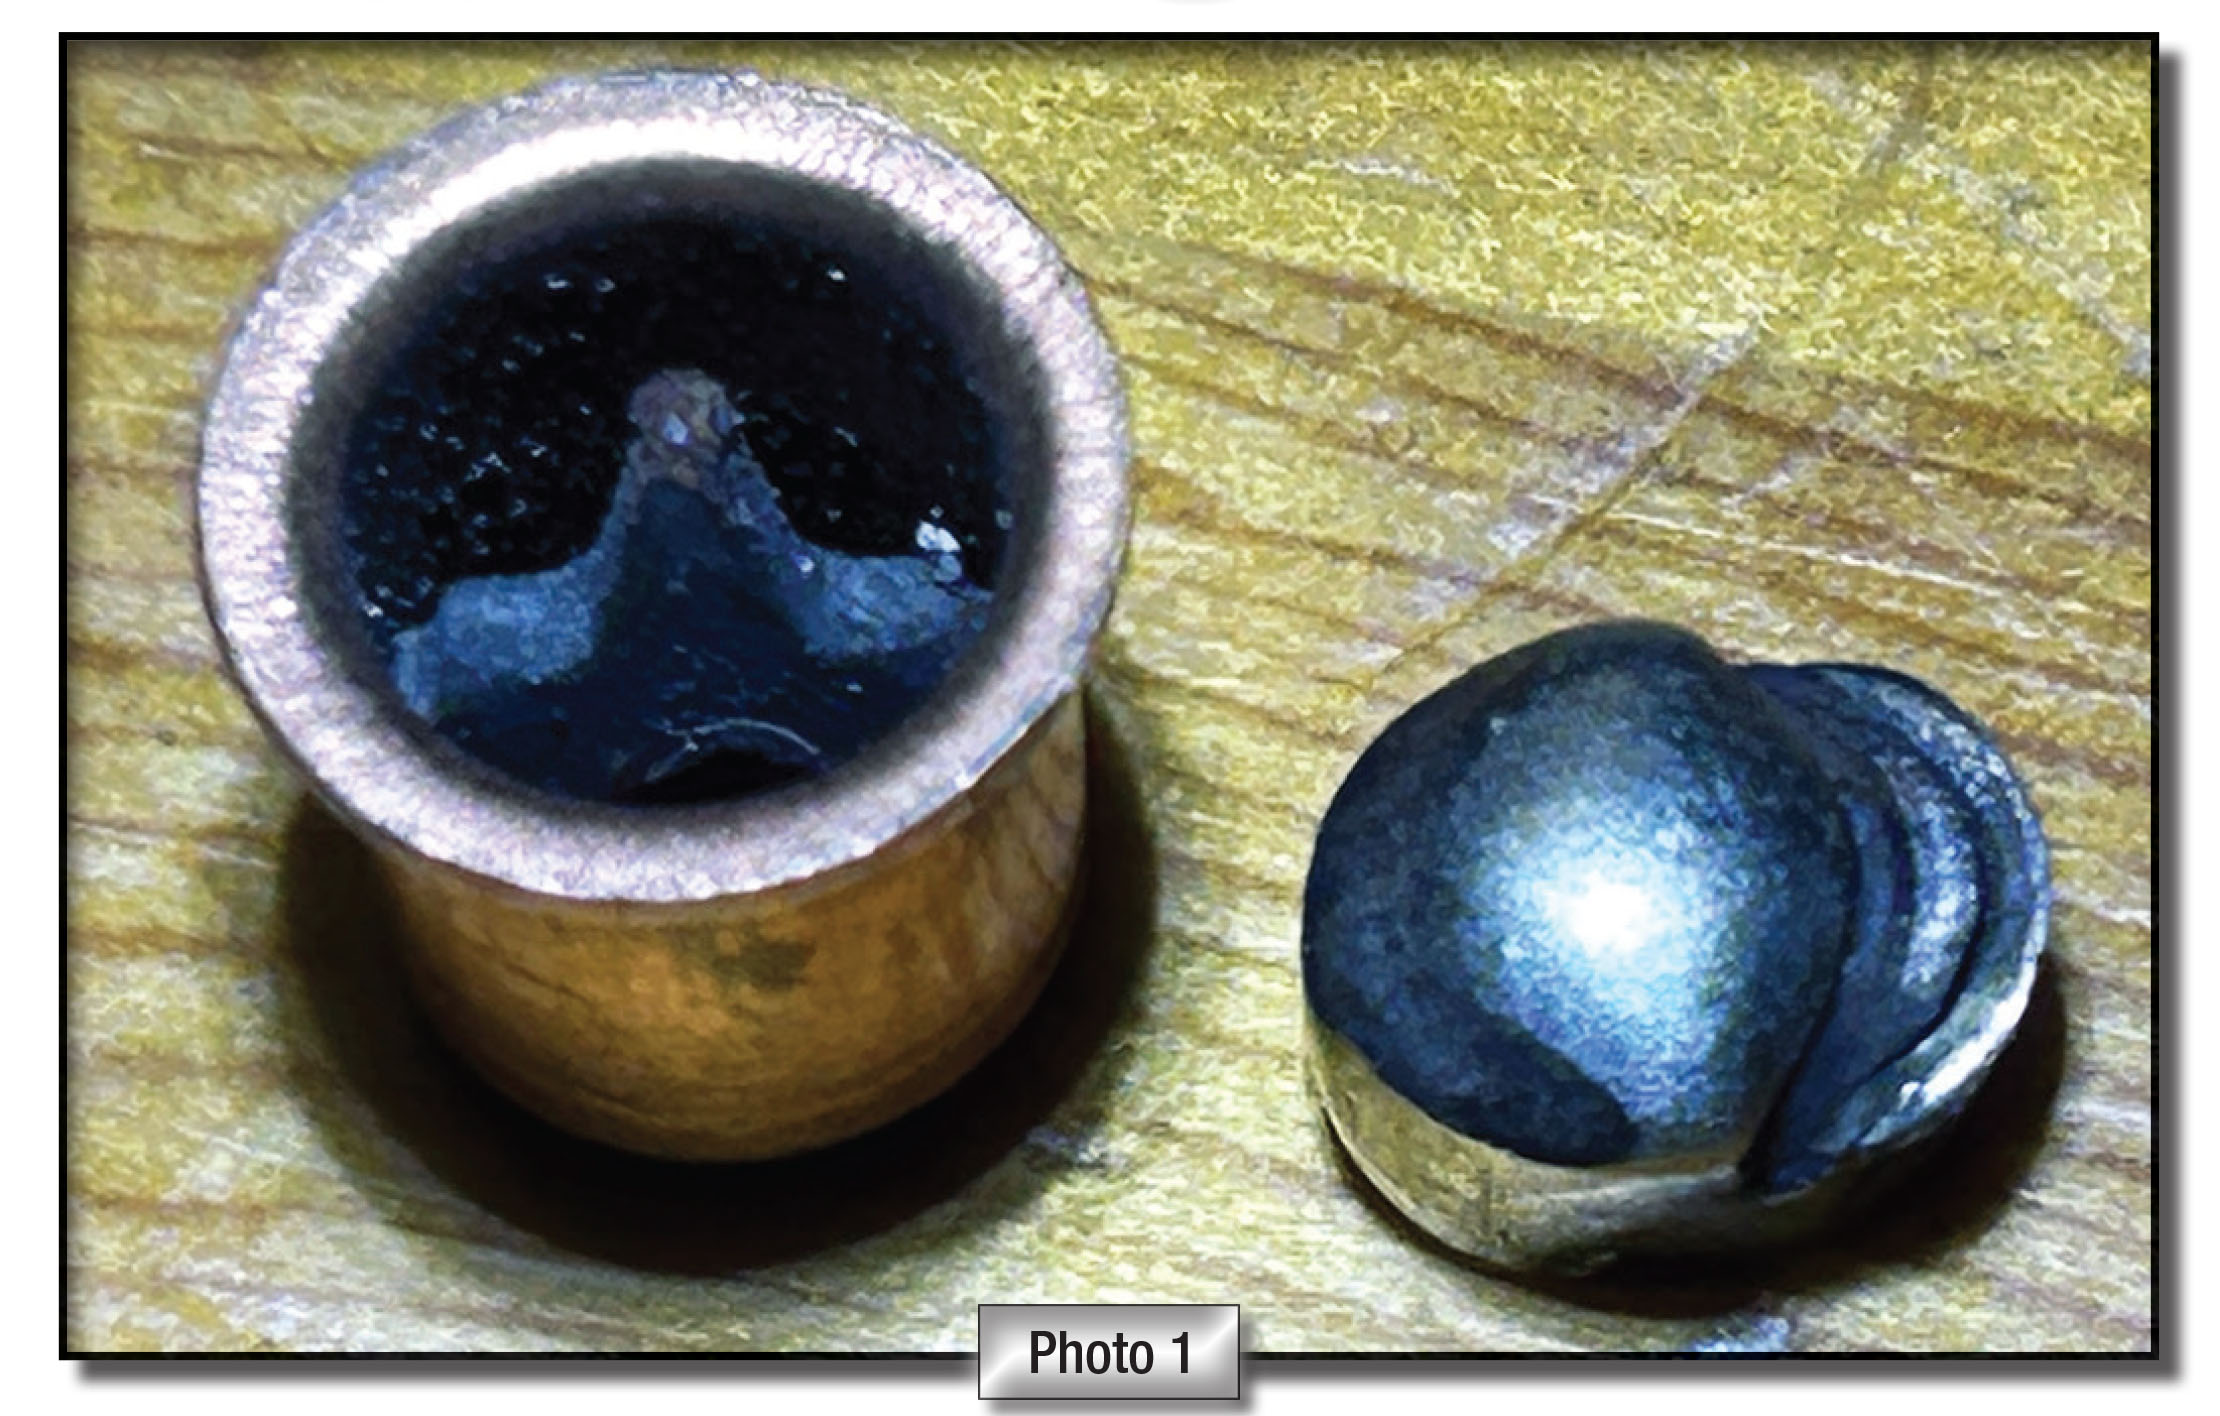
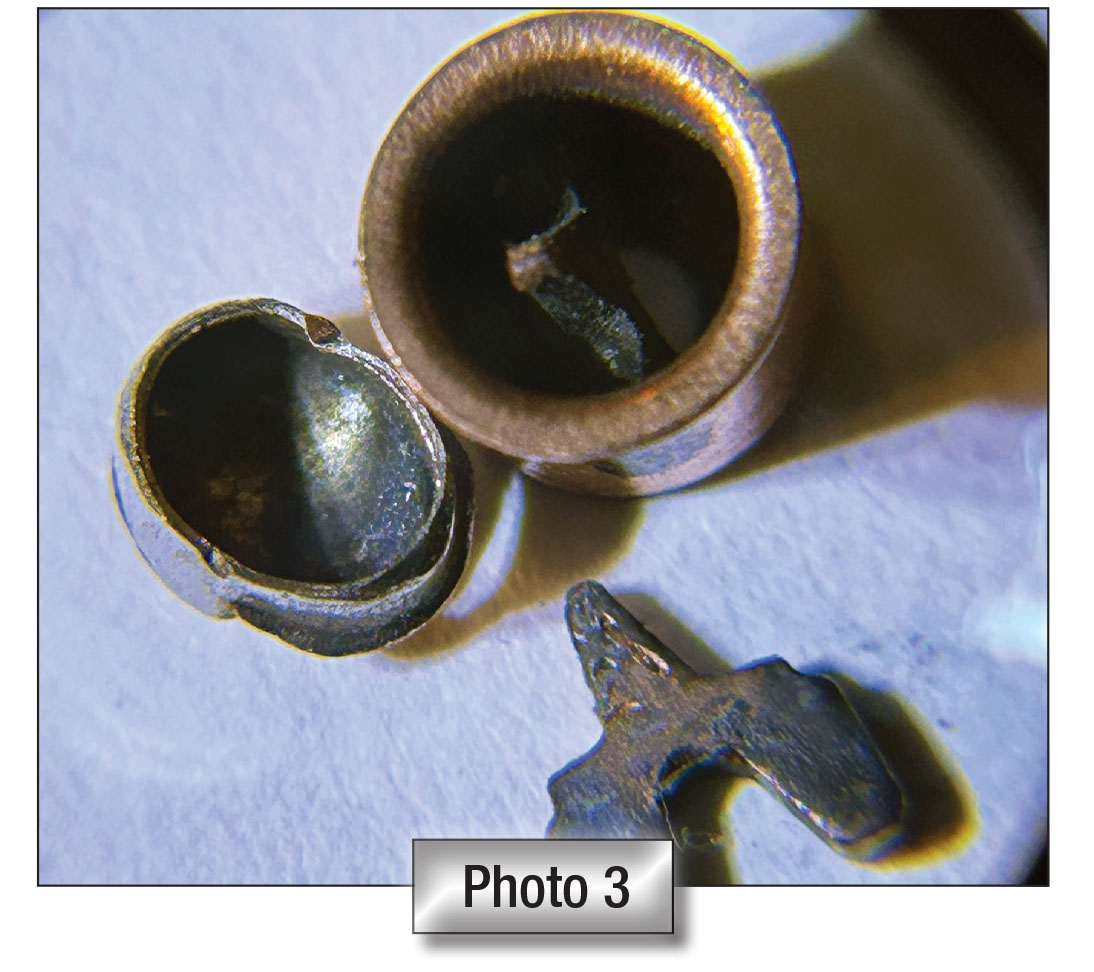
Next, I investigated the primer seating assembly on the press and found a primer in two pieces. Photo 1 shows the upper portion was the flanged battery cup with the anvil still in place but offset to one side, not in its normal centered position. The other piece was a seriously deformed but empty primer cup with a bead of metal on it. The interior of the primer cup is shown in Photo 2 and Photo 3. I noted two things: the hemispherical (ballooned-out) appearance of the primer and there was no indication of a firing pin strike. The second V-shaped anvil pictured was removed from another spent primer and added to the photo to allow the reader a better view of this third and last key hardware component.
What caused this situation was clear. Not liking the final crimp on the last loaded round, I brought down the handle again to correct the crimp, and while doing so, I released a second primer on top of the first one I just released on the previous stroke. Unusually stressed, the lower primer ignited as I unwittingly tried to insert two primers into a single hull.
This was a case of operator error on my part. Not just one error, but two, which compounded the problem. I should not have dropped the second primer (rookie mistake), and I should have checked the press’ primer cup to make sure it was clear (my bad) before proceeding.
The primary takeaway is that safety is paramount. Always practice it.
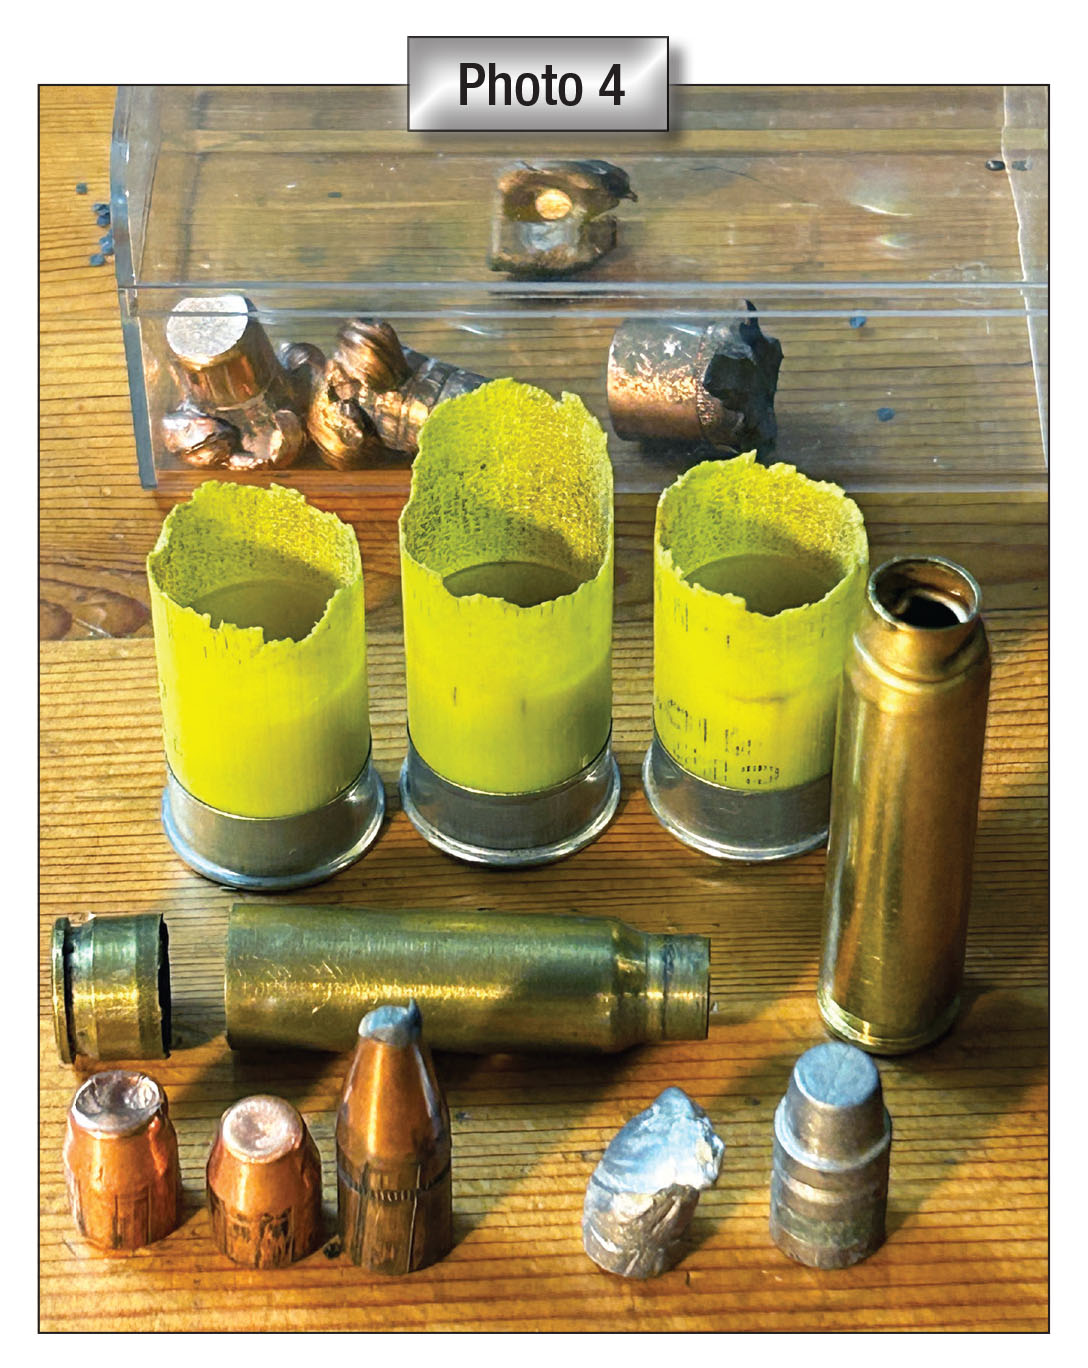
Frankly, I am shocked and more than a little embarrassed by my own lack of care. Into the “Box of Shame” went the remains of the primer (Photo 4). This box is to remind me of my mistakes, shaming me into doing better. There it sat for several years until I decided to do an in-depth study on shotgun primers. This “event” was supposed to be a brief mention in the article. It morphed into a couple of paragraphs. Which grew into a sidebar. Then, it had an explosion of its own as this voyage of discovery was longer than expected.
When things go wrong, you learn stuff. I told myself to stop with the self-flagellation and get on with the job. I scolded myself, “Use your training as a scientist and your degree in mechanical engineering to get to work. Suck it up, Buttercup!”
Penance was required (raised Catholic). Investigating this disaster by determining the physical facts leading to an understanding of what really happened seemed most appropriate.
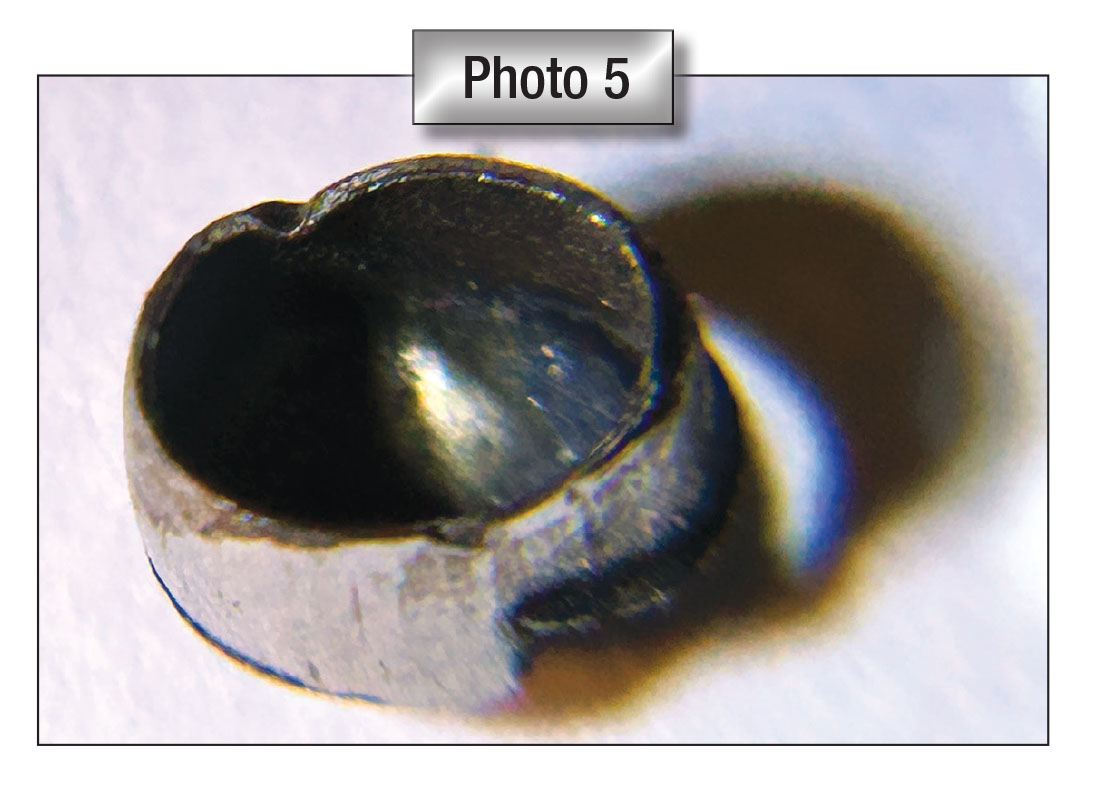
Examining the primer cup more closely, its hemispherical shape indicated it had been blown out of the battery cup backward by the primer’s brisance (Photo 5). Brisance is the ability of an explosive to detonate and shatter. Greater brisance has increased demolition power. All primer compounds are brisant. Magnum primers have a greater degree of explosive power.
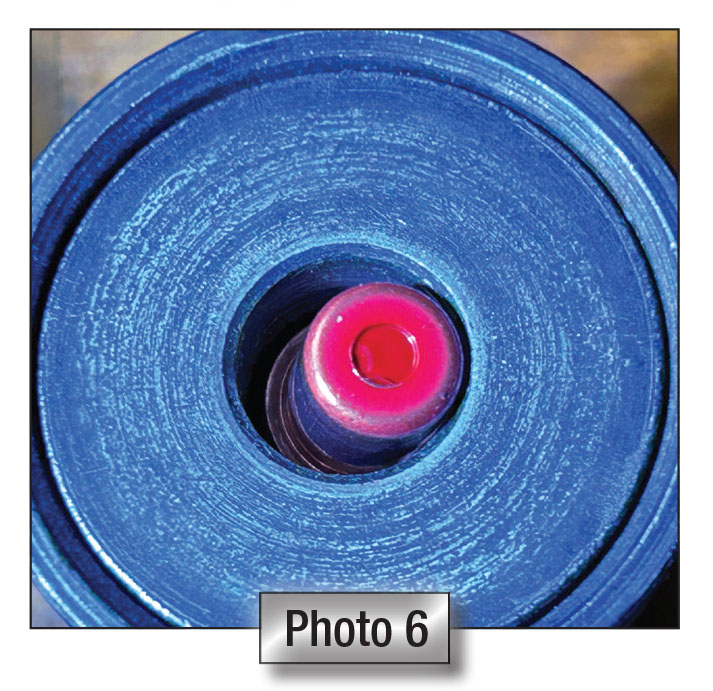
I wondered if the “bead” of silver- colored metal firmly welded to the outside may be a piece of shot acting as an impromptu firing pin in the bottom of the primer cup assembly. So, I attempted an experiment. I went to my 16-gauge press and removed all the primers from the feeder tray. I then dropped a single piece of No. 8 Extra Hard West Coast Premium Magnum shot into the primer cup assembly. I placed a primer on top of it. Photo 6 shows the primer is significantly offset to the side due to the piece of shot beneath it. Donning safety equipment, I proceeded to load the primer into an empty hull with a slow stroke. To my surprise, the seriously misaligned primer seated properly, and (much to my relief) the primer did not ignite. Removing the primer assembly cup from the press, I dumped out a seriously flattened piece of No. 8 shot (Photo 7). This photo also shows the primer just inserted into the 16-gauge hull, the primer cup (with the bead) and flange batter cup (showing the anvil).

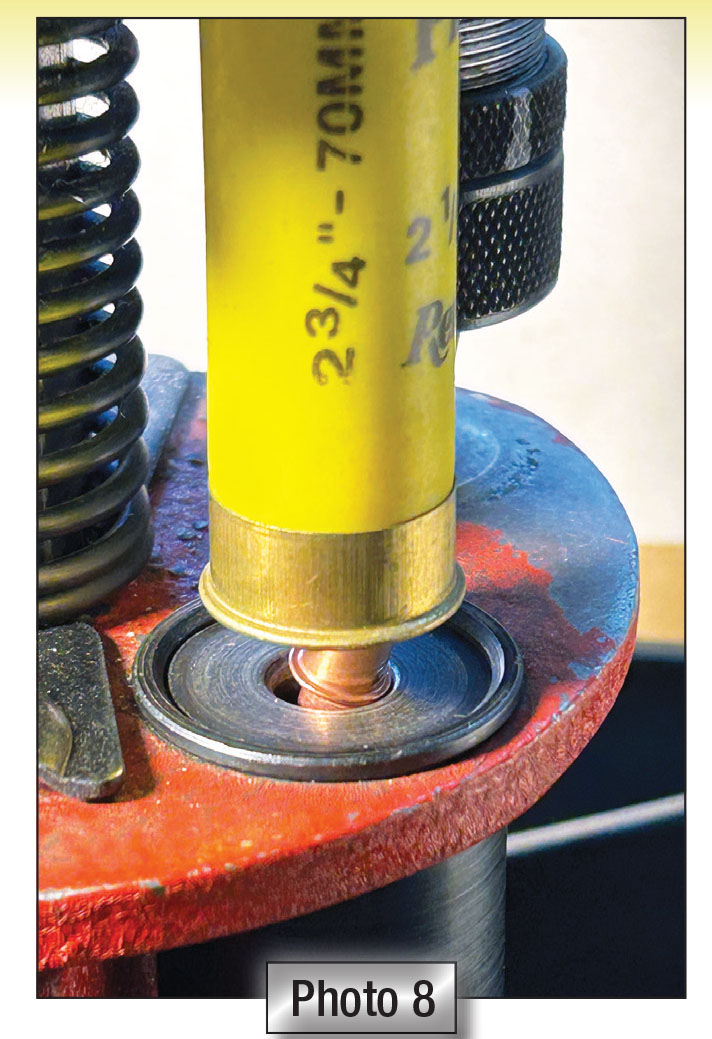
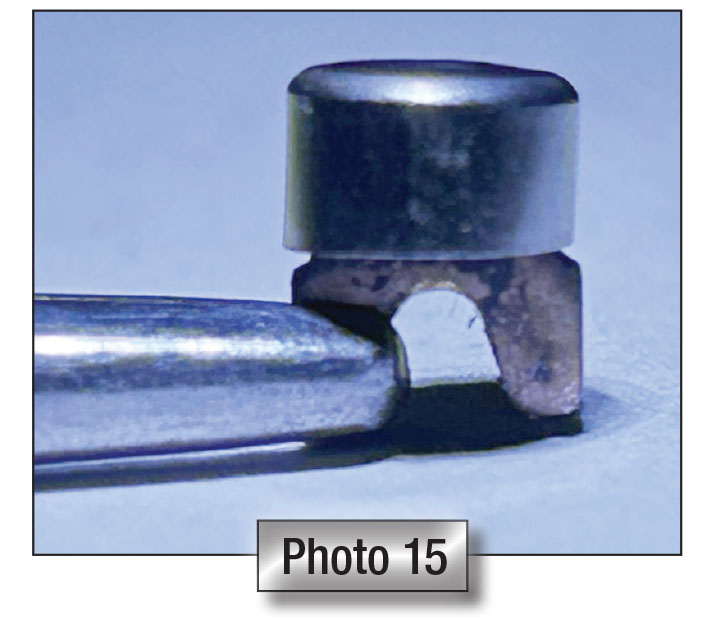
I then went back to the 20-gauge, dropped in a piece of No. 8 shot, and placed two spent primers on top of it, attempting to recreate the original event. I found the two stacked primers so misaligned by the piece of shot they rested on that the upper primer caught on the bottom of the hull’s head (Photo 8) and would go no further. The shot so misaligned the primers that the press was unable to function. I failed in recreating the “event” in this manner.
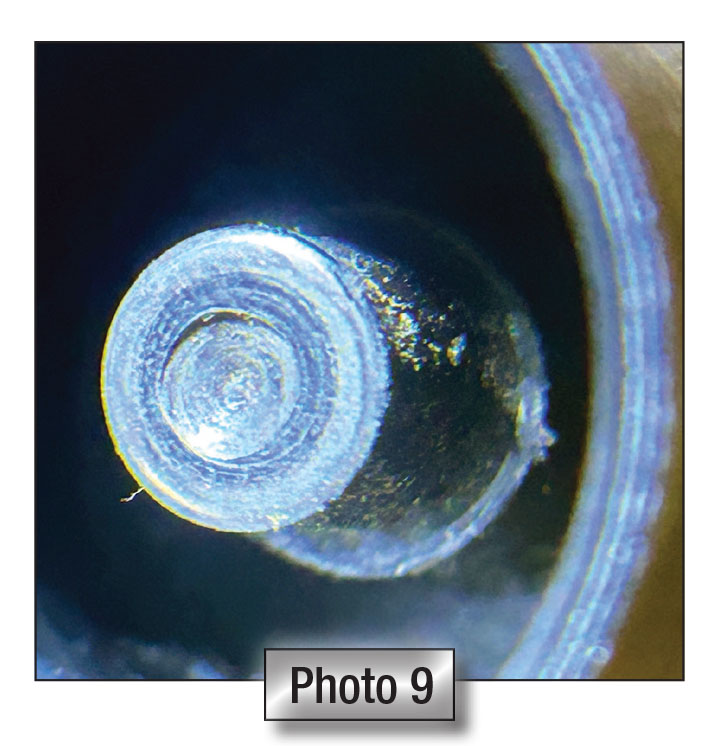
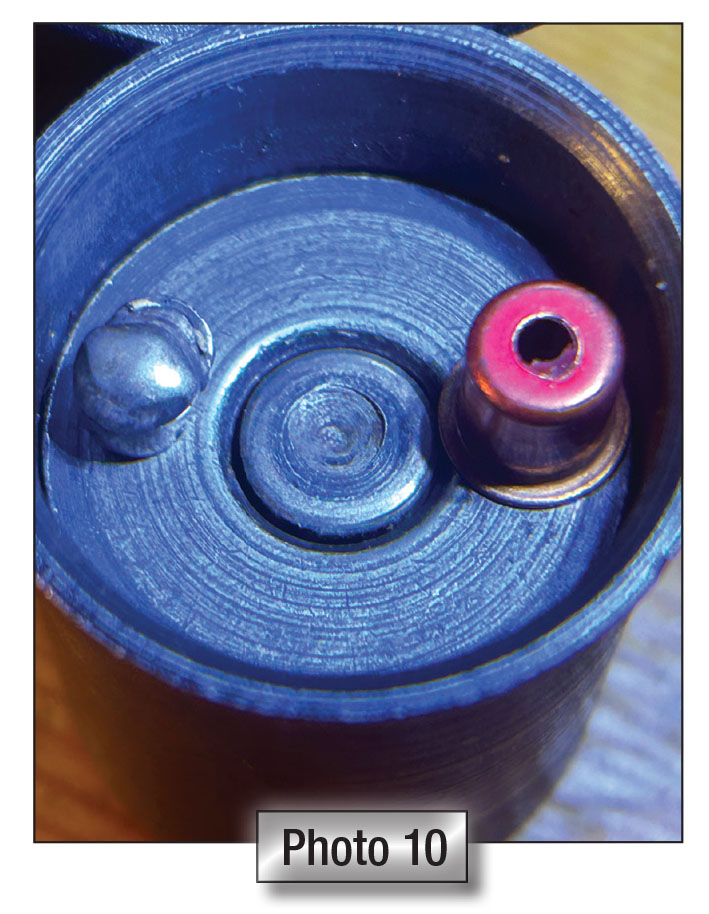
Even an extra hard magnum shot was found to be too soft to act as an impromptu firing pin. I then dug deeper than previously by finally (after several years!!) examining the press’ primer seating assembly center post, which revealed its normally flat surface the primer sits upon to be inserted into the hull, had a distinct odd-shaped hemispherical-like crater in it (Photo 9). A comparison of the shapes of the irregular bead on the outside of the primer cup to the irregular crater on the center post is shown in Photo 10. Similarities in shape outlines indicate they were created during the same event. So, going forward, I am going to refer to this primer as the “event” primer for the balance of the article.
Additionally, the bead was magnetic, so it was not lead but steel, the same material as the center post of the primer seating assembly. The attached bead on the bottom of the primer cup was firmly attached as if welded on. I could not remove it.
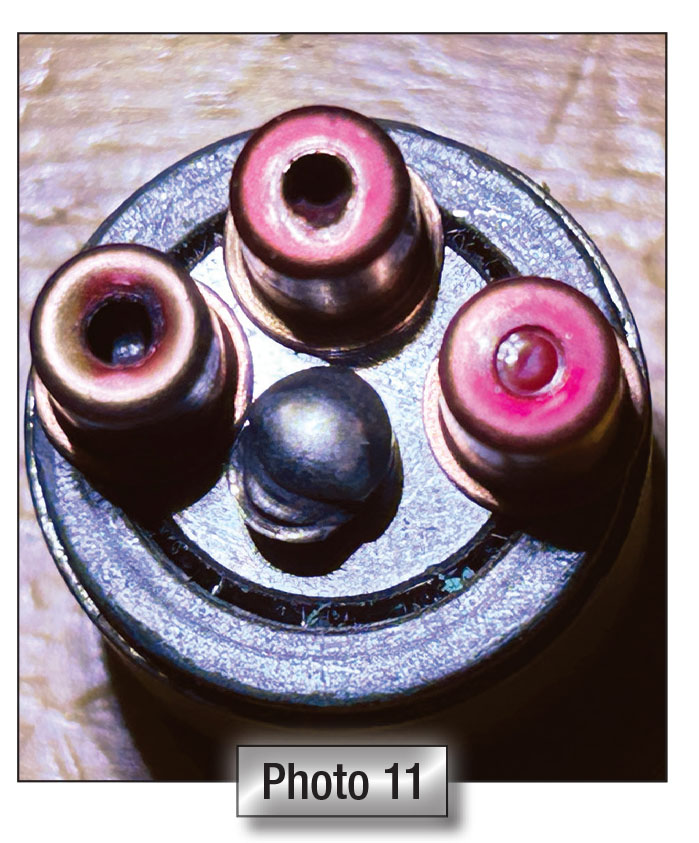
I believe the bead was welded in place by the brisance of the primer’s ignition. The explosive flash escaped primarily backward into the primer cup as the flash hole was firmly covered by the primer immediately above it, forcing this alternative path. Photo 11 shows the three primers with the “welded” primer cup in the middle that supports this. The primer on the right is an unfired primer with its red lacquer sealant over the flash hole. The primer on the left was fired normally. Note that the red lacquer sealant is almost completely gone due to the brisance of the primer burning through the flash hole in the typical manner and at the normal rate, probably helped by the ignited smokeless powder.
In a flash (literally), the event primer cratered the primer assembly’s center post with its high instantaneous energy (brisance). The material ejected from the crater coalesced and adhered to the bottom of the cup as it resolidified with rapidly diminishing temperatures. This is a crude explanation of explosive welding, which is a commonly used technique to join metal plates employing a high energy rate of deformation generated by the detonation of an explosive. That’s in keeping with the function of an explosive primer.
Starting with the Basics to Find the Answer
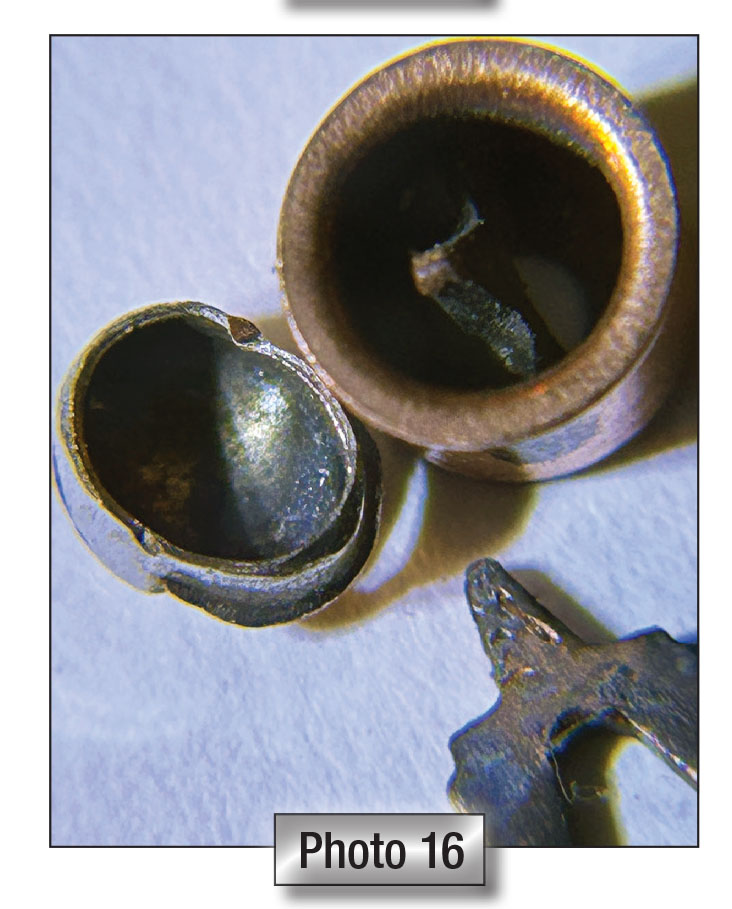
A basic discussion of shotgun primer anatomy is in order as they differ from rifle and pistol primers as they have a battery cup. The basic hardware components of a spent shotgun primer discharged in a shotgun are shown in Photo 12. The empty primer cup is shown on the left. On the right is the flanged battery cup with its V-shaped anvil pulled forward from its normal position for easier viewing to help our understanding. The explosive priming mixture sits in the primer cup of an unfired primer. The point of the anvil is positioned into the explosive mixture at a small but critical distance from the bottom of the primer cup. When the firing pin strikes the primer cup, it creates that familiar dimple that contacts the anvil’s V-shaped point, causing the pressure- sensitive explosive mixture between them to ignite.
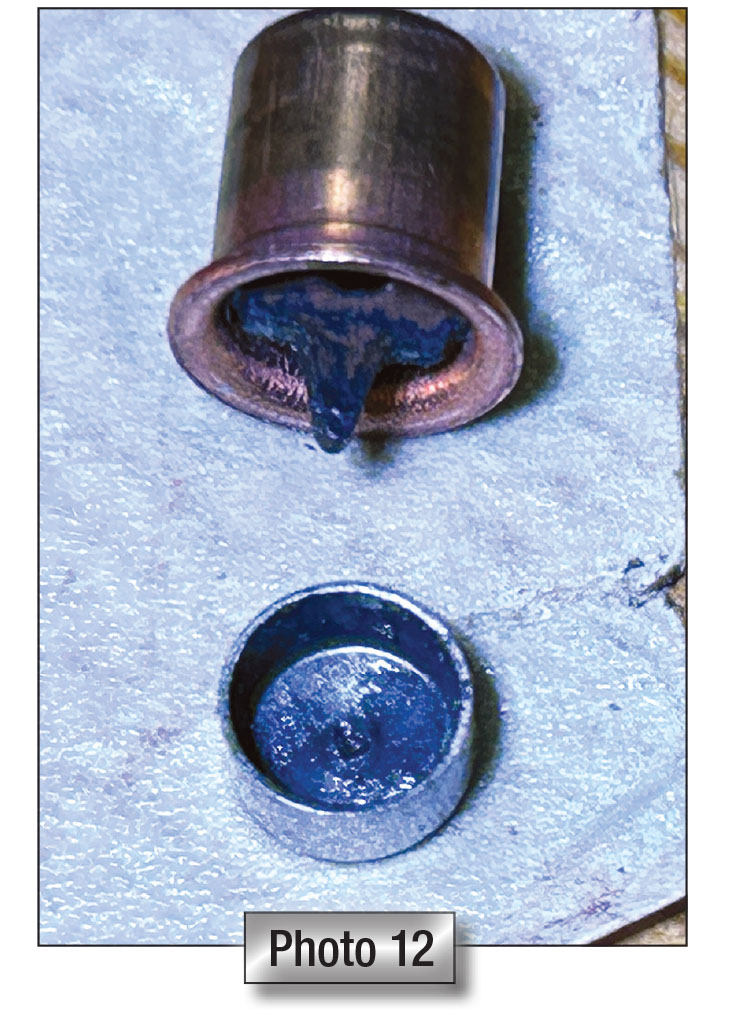
Looking closely at the primer cap in the same photo, you can see the anvil’s strike mark in the center of the bump made by the firing pin. The primer’s brisance exits through the vent hole located in the top center of the battery cup. The vent hole is covered with paper or lacquer to prevent powder from entering the primer. This maintains the burning characteristics of the powder. Powder falling into its vent hole can alter the burning characteristics, possibly in a dangerous manner.
Shotgun primers must be seated flush with the base of the shell case. The shotgun battery cup performs the same function as the prescribed depth primer pocket built into centerfire brass cartridges. The small rim, often referred to as a flange, at the bottom of the battery cup, holds the primer at the proper depth while providing a tight seal.
Reviewing the Event
The lower primer went off because it was not held by its rim, as described immediately above. The upper primer was already seated in the base of the shell. The lower primer was caught between the base of the shell above it and the immovable post of the primer cup assembly. Its upper face was being pushed down by the base of the hull above it by the lever acting through that hull’s basewad. The force applied to the lower primer put it into compression. As more force was applied, the height of the primer was further reduced. At some point, this reduction in height pushed the anvil into the primer cap, causing it to explode.
The upper primer’s situation is significantly different. It, too, is held down in place by the lever and reprime punch tube acting through the hull’s base wad. In this case, the pressure is only applied to the flange of the battery cup, as explained above, not the entire cup. The upper end of this primer is not touched by the machinery. That end is free. So, there is no mechanical stress across the entire length of the upper primer the way there is for the lower primer.
Reviewing Key Components’ Design & Function

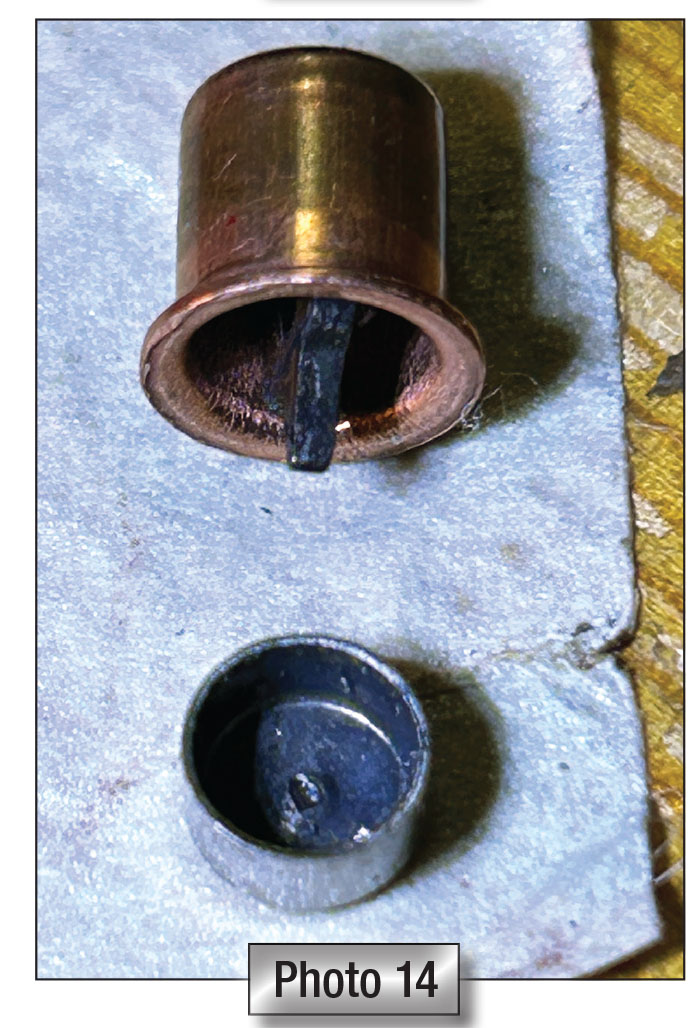
Photo 13 shows the V-shaped anvil’s distinct shoulder profile, with notches at the outer edges to accept the movement of the primer cup rim within the battery cup when the primer is inserted into the shell’s basewad.
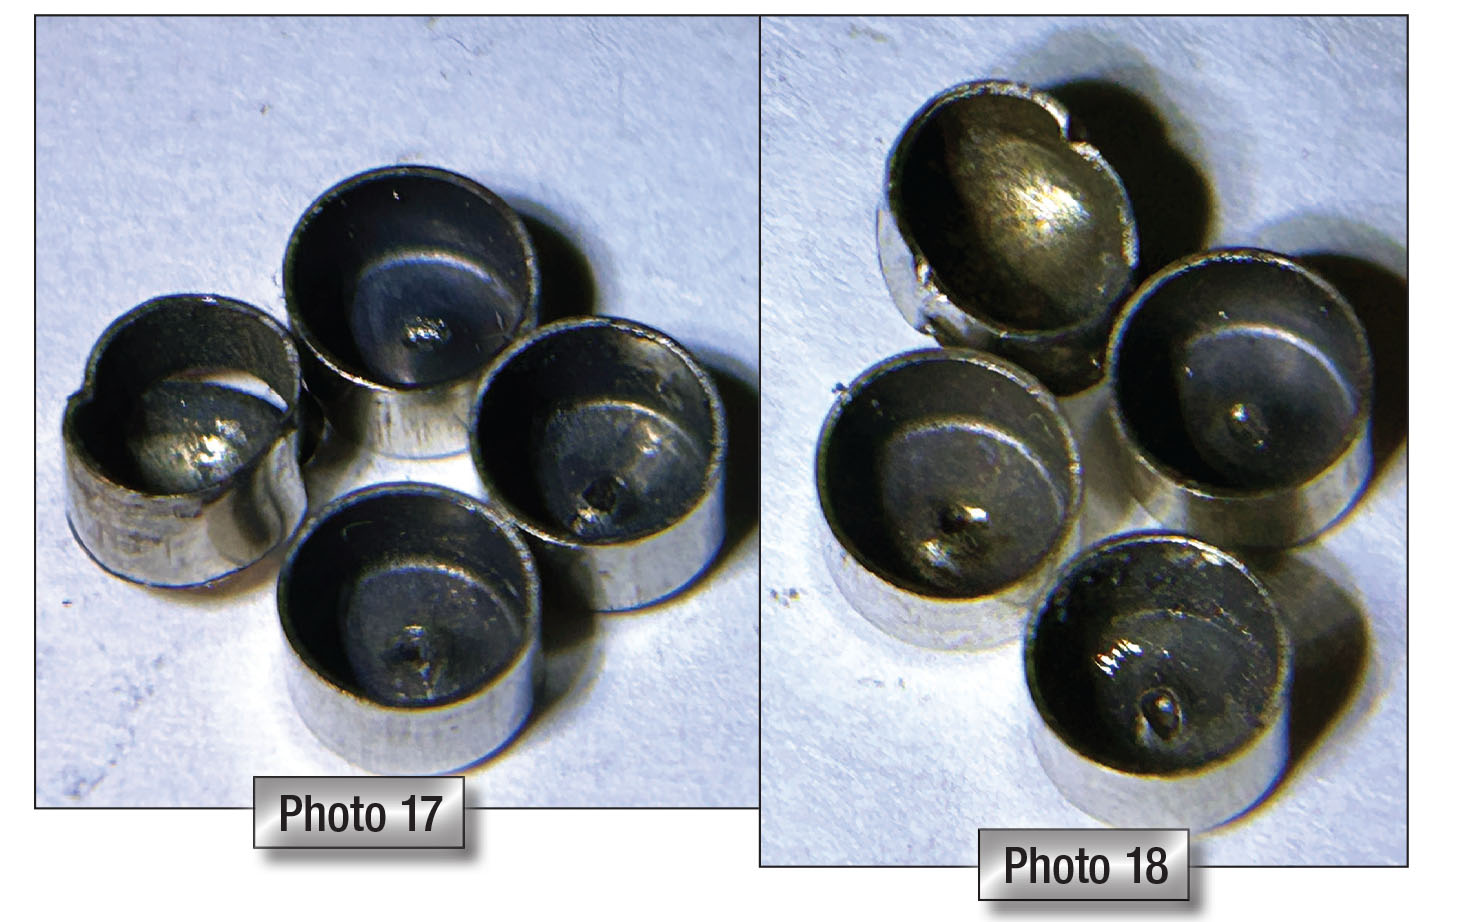
Two images of the same subject but from different angles are shown in Photo 17 and Photo 18. It shows the event primer with three others fired normally in my shotgun. Note that the edges of the other three primer cups are free of any nicks despite having their primer pushed 0.012 inch to 0.013 inch further into the battery cup in a simulated loading of the initial “event.”
In the simulation, a spent primer was used to insert a new primer into a hull. Safety gear was used during this session as this is not a safe or normal reloading practice but a simulation of what created the original unintended ignition of the primer in the reloading press. I loaded 100 primers in this manner. While there were no issues and no unintended explosions, primer cups were found to be more deeply inserted into the battery cup 0.015 inch beyond the new primer original depth of 0.006 inch. Seated in the normal manner, the average additional seating depth is only 0.002 inch.
These primers were the ones pushed into the battery cup 0.012 inch more than normal. Yet none showed nicks on the edge of the primer cups. Only the “event” primer exhibited the two nicks on the edge of its primer cup, as shown in the photos above, and only it exploded unintentionally.
I believe those nicks were created when the edge of the primer cup came into hard contact with the shoulders of the anvil, displacing the anvil to the side when excessive pressure was applied to the upper face of the battery cup. I believe this brought the anvil’s point in contact with the primer cup, igniting the primer and causing this event.
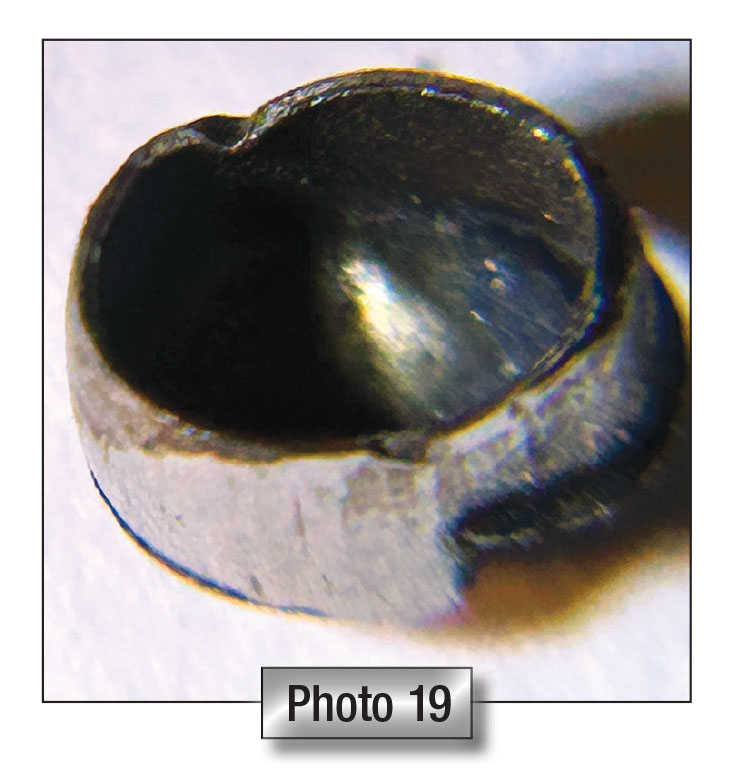
Photo 19 shows a closer look at the “event” primer cup with a more distinct view of its edge, with the two nicks showing directly across from one another where the shoulder of the anvil gouged it. Based on this observation. I suspect the support of the primer cup by the shoulder of the anvil appears to be the method of “last resort” the primer manufacturer uses to maintain the final safe distance between the primer cup and the point of the anvil’s V to prevent unintended ignition of the primer mixture. The nicks in the edges of the Event primer are physical proof this critical distance was compromised.
The unintentional explosion of a primer was caused by my operator error. Reviewing the cause and becoming familiar with both the primer and the reloading press, I have come to appreciate the built-in safety of both designs. A modest amount of attention while using the equipment as intended will keep you safe.
Possible Chain Reaction?
I was most grateful NO CHAIN REACTION occurred as the primer immediately above did not ignite even though the lower primer’s flash hole was firmly placed against it when it exploded. Oft-repeated Urban Myths of primers wreaking destruction-fueled my fears.
However, I found this lack of a chain reaction is in keeping with the Sporting Arms and Ammunition Institute’s (SAAMI) demonstrations in their video entitled “Sporting Ammunition & Firefighting” done with the help and guidance of the International Fire Chiefs Association. To view this, go to the site: saami.org. Click on tab: Publications & Advisories to pull down its menu and click on the “Sporting Ammunition & Firefighting” video.
It’s a real eye-opener, dispelling many commonly held misconceptions based on “Hollywood Magic,” showing how ammunition really reacts to fire, when dropped from significant heights and the lack of chain reactions.
During the video, they consumed 400,000 rounds of ammunition. At 8:41 into the video, they placed a blasting cap on the primer of a loaded centerfire round, placed it back in the box and lit it off. Spoiler Alert: The other cartridges and primers did not ignite. There was no chain reaction.
Immediately thereafter, they did the same with a carton of 250 shotgun shells by exposing the primer by cutting a hole through the side of the case and cartridge box to be able to attach another blasting cap directly to the primer of a loaded shotgun shell. Same result. There was no chain reaction when the cap was set off.
Their introduction reads:
“The video shows that sporting ammunition outside a firearm:
(1) is unlikely to ignite under extreme conditions of impact,
(2) will not propagate in a chain reaction from one cartridge or shell to another,
(3) does not mass explode, and
(4) may be controlled by firefighters using water and wearing standard structural firefighter protective clothing and self-contained breathing apparatus.”
Neither my “event” nor the testing performed by SAAMI produced a chain reaction.
That doesn’t mean it can never happen. Primers are explosive devices that deserve our utmost respect by always using safe reloading practices. But when using normal reloading practices, primers need not be feared. Respected, yes. Feared, no.